Blog

  • A brief study on sharpening stones – Part 64 – Jende Resin 1 µm (Diamond, Resin)

    This is part of a series of blog posts – looking into the appearance and composition of commercially available sharpening stones. If you are interested in the previous episodes, check out the archive for them.

    If you have some suggestion on what I should look at next, or want to share your super secret DIY stones, I could be persuaded to open the bag of analytical devices… hit me up on Instagram under @marvgro for that.

    Disclaimer: I’m not for sale. Every review you see on this blog is bought with my own money. I have no affiliation to any manufacturer.

    Review

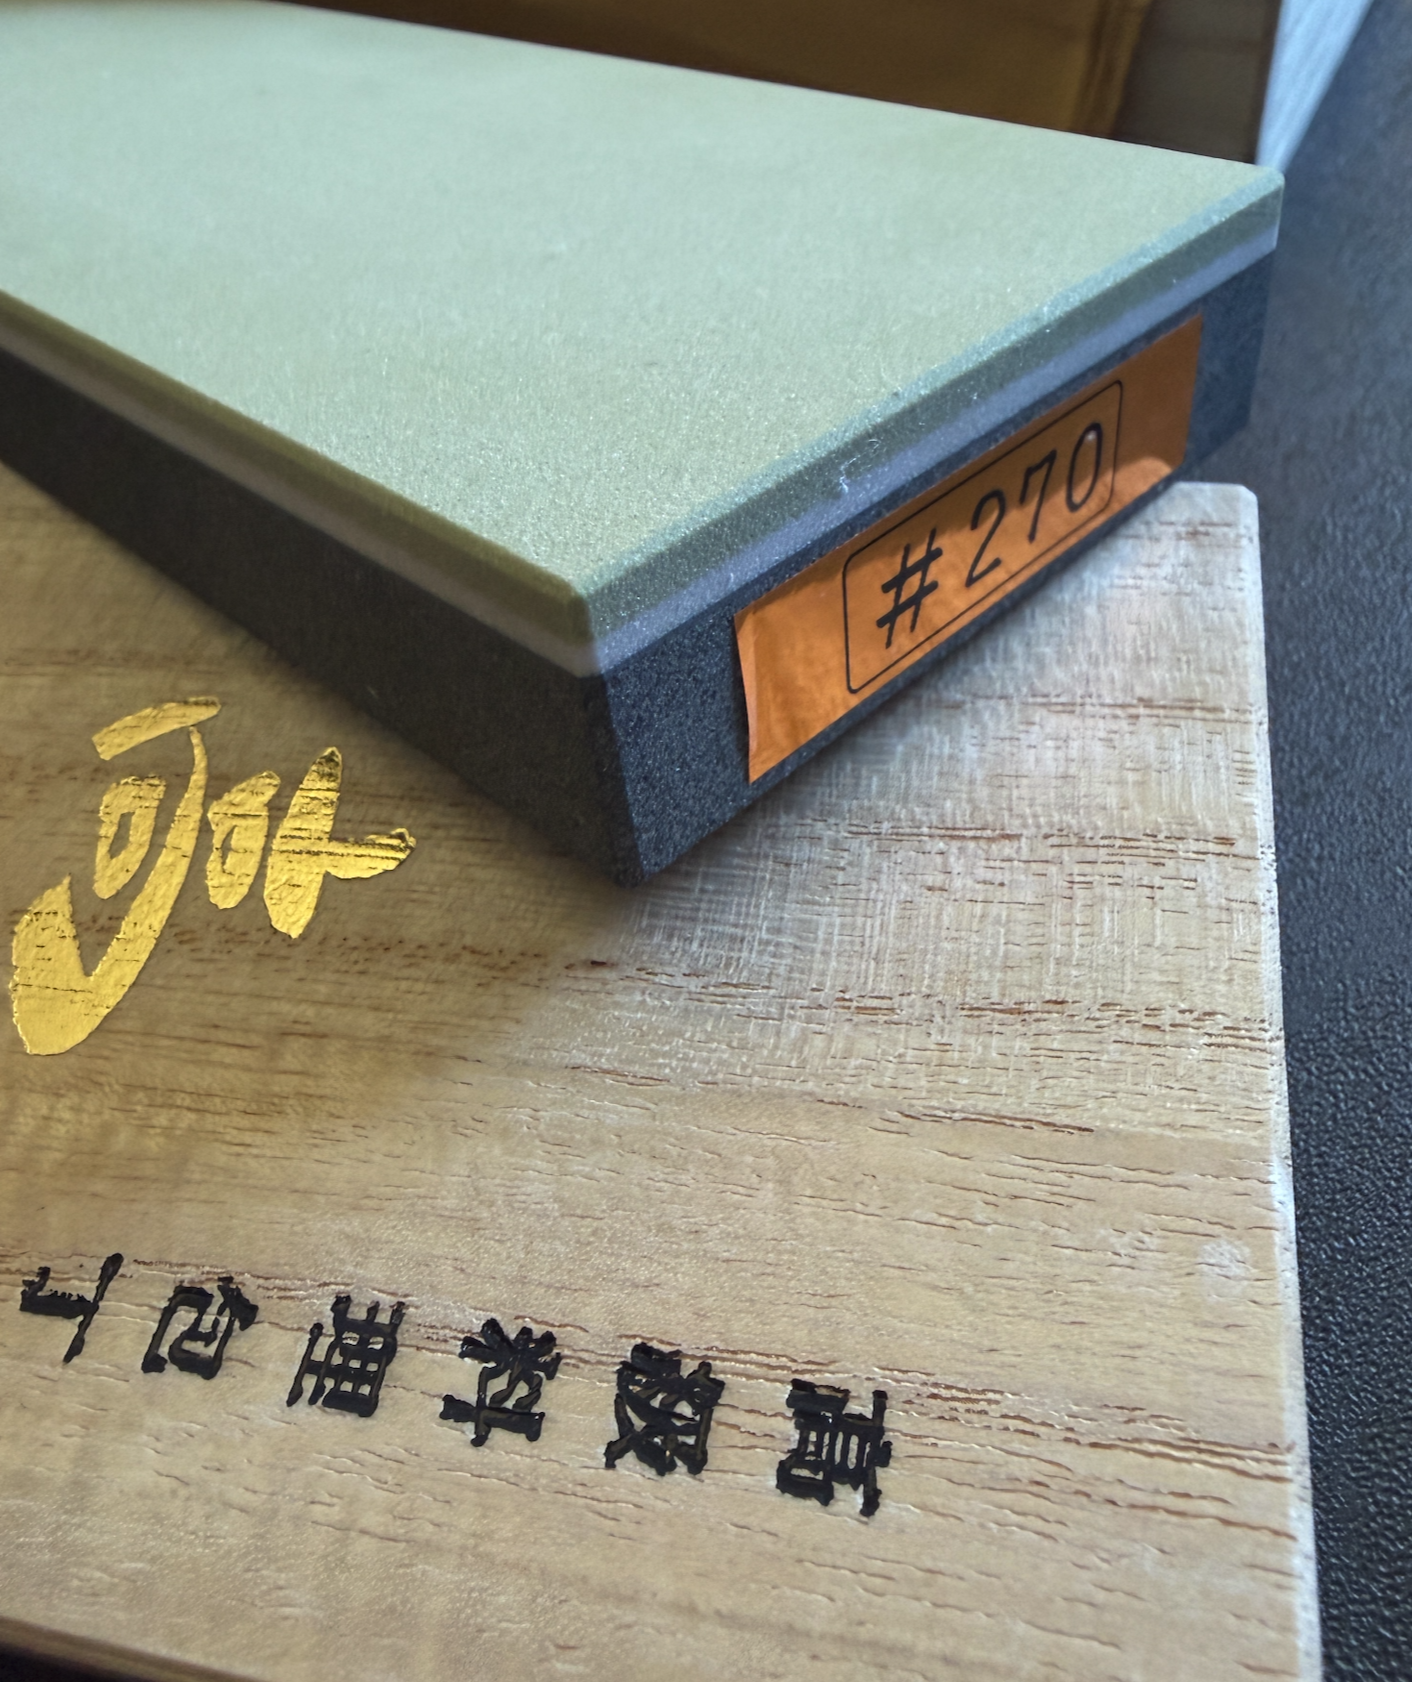
    Yes, I know. “Another Jende”? Yes. I spend a year somehow avoiding the Jende stones in my reviews, then ordered multiple in one go. Be sure to check out the reviews for the “big brothers” – the 120 µm, which I found to be quite good, and the 30 µm one. Today, we’re dipping down to the finest of the stones – the 1 µm Jende diamond resin stone.

    Let’s take a look under the optical microscope!

    Optical micrographs of the Jende 1 µm resin stone. Instrument: Marvscope

    The stone is a light green colour, and pretty homogeneous. Some darker, quite a bit larger particles can be made out. My NA 0.3 objective lens does not have the resolving power to make out individual 1 micron grains – what we are seeing as grains is agglomerates of resin but also diamond grains. This is revealed when we take a look in the SEM:

    SEM micrographs of the Jende 1 µm resin stone. Instrument: Zeiss GeminiSEM 560.

    In the 30 µm jende resin stone review, I already commented on the amount of non-diamond abrasive grains. Unfortunately, this is something that the 1 µm stone suffers from – but, as we will later see, to even larger effect. Unfortunately, the stone suffers from some amount of agglomeration, where the diamond clumps together. Furthermore, diamond-resin grain adhesion doesn’t seem to be that great, either. A lot of small voids can be made out, that are exact imprints of grains. Last but not least, there are other, hard, abrasive grains that are nearly 10 times larger than the rated grit of the stone:

    Microscopic image showing a detailed view of a surface structure, with various particle sizes marked in micrometres. Measurements include 2.490 μm, 9.122 μm, 1.429 μm, 1.458 μm, 1.661 μm, 1.257 μm, and 8.486 μm. The image features scientific annotation and measurement scales.

    SEM micrograph with size measurements of different abrasive grains. Instrument: Zeiss GeminiSEM 560.

    We’ll check out the chemical composition in a moment, but already I can tell you – the surface morphology will be dominated by these roughly 10 µm sized particles.

    EDS analysis of the Jende 1 µm resin stone. Instrument: Oxford Ultim Max  ∞ 40mm2 EDS sensor. Note that our EDS sensor doesn’t show elements lighter than boron.

    EDS analysis confirms that these grains are oxide based ceramic abrasive grains. This is bad in multiple ways: first, it will leave scratches in the actual steel matrix of whatever you are sharpening. These grains are hard enough to easily scratch even the hardest martensite. At the same time, their hardness is insufficient to properly cut through most carbides – they dull very quickly, and then create a lot of pressure on the apex. Cracking near the carbides and general smearing around them is the consequence.

    EDS overview of the Jende 1 µm resin stone. Note the dominance of larger, oxide abrasive particles. Instrument: Oxford Ultim Max  ∞ 40mm2 EDS sensor.

    In a larger overwiew zoom, this looks more like a ceramic-resin stone, and less like a diamond stone. Oxide particles dominate!

    In order to evaluate the sharpening performance and material removal mode of this stone, a blade was sharpened with it. I am using a standardised testing procedure, read about it hereNevertheless, it’s 65 HRC M398, and sharpened to 17 DPS with resin bond diamond stones down to 10 µm. Afterwards, the tested stone is used, first in a back and forth movement until the surface becomes homogenous, and then alternating, edge trailing strokes (5-5-3-2) on each side, for a total of 20 strokes towards the apex per side. No pressure is applied but the weight of the apparatus. Moreover, the same approach is repeated with a blade in NitroV at 59-60 HRC.

    The edge is then analysed in the electron microscope for breakouts and morphological appearance.

    Let’s start with the harder steel – the M398 blade:

    SEM micrographs of the M398 edge finished with the Jende 1 µm resin stone. Instrument: Zeiss GeminiSEM 560

    Zoomed out, the edge looks quite refined, and the apex itself is pretty sharp as well. Zooming in further, one can see a lot of scratches, a certain raggedness but also clear signs of prow and burr formation, due to the larger particles found in the stone. The optical micrograph further confirms this – this is quite frankly a miserable result for what is supposed to be a 1 µm stone:

    An extreme close-up image showing a textured surface under a microscope, highlighting fine scratches and patterns. A scale bar indicates 200 micrometres.

    Optical micrograph of the M398 bevel. Instrument: Marvscope

    Which is further visible in the white light interferometer measurements of the bevel: a diffuse, marred surface:

    Three-dimensional surface topography image showing surface features of a material, with a colour gradient indicating height variations measured in nanometers. Scale bar and axes are labelled in micrometres. Includes a colour scale for height reference.

    3D surface height map of the M398 Bevel. Instrument: Zygo NewView 9000, Objective Lens: 20X. Metrological filter chain: LS-Plane to orient data, cutoff 0.1/99.9 percent to remove outliers.

    With the surface roughness parameters as follows:

    Sa0.0241µm
    Sq0.0387µm
    Ssk-0.5204
    Sku12.73

    ISO 25178 surface roughness parameters. S-Filter: 2.5 µm (gaussian), L Filter: 0.25 mm (gaussian). No F operation besides LSQ leveling.

    Let’s take a look at the NitroV edge:

    SEM micrographs of the NitroV edge. Instrument: Zeiss GeminiSEM 560

    The issues seen in M398 are apparent here as well, with deeper scratches. Compared to the M398, NitroV has much more of the softer steel matrix, so the oxide particles are able to plough and cut deeper into the bevel:

    Microscopic image showing a textured material surface, divided into two sections, with distinct patterns and a scale for reference.

    Optical micrograph of the NitroV bevel. Instrument: Marvscope

    This is further reflected in the 3D height map:

    3D surface plot depicting varying heights with a colour gradient representing elevation in nanometres.

    3D surface height map of the NitroV Bevel. Instrument: Zygo NewView 9000, Objective Lens: 20X. Metrological filter chain: LS-Plane to orient data, cutoff 0.1/99.9 percent to remove outliers.

    And a significantly rougher set of surface parameters:

    Sa0.0424µm
    Sq0.0579µm
    Ssk-0.2916
    Sku4.433

    ISO 25178 surface roughness parameters. S-Filter: 2.5 µm (gaussian), L Filter: 0.25 mm (gaussian). No F operation besides LSQ leveling.

    Not a lot more needs to be said about this stone, so let me sum it up with a bit of a subjective view on it:

    The stone itself is quite “quick” in it’s effect. The feedback is similar to other Jende resin stones, as I’d say the mix of resin and filler abrasive particles is dominating. Jende needs to work on mixing, get finer abrasive fillers or skip them completely. A very challenging task for them would be to fix grain adhesion – which might just not be needed at this grain, as a rolling 1 µm stone would quite likely quickly polish any bevel.

    I was told beforehand that the 1 µm stone isn’t very good -and my test kind of confirms this. I heard the 3 µm is much better. Overall, the finish of this stone is not at all related to it’s rating, and I think there are a lot of 5 to 3 µm rated stones on the market that can easily outperform this one.

    Jende has reached out after my first review, and took my reviews in the best possible way: free, high quality analysis of their stones and the possibility to maybe improve on their product. Kudos to them! I hope they take a look at this as well, and improve on the 1 µm stone. After all, the 120 µm shows there is potential to their abrasive technology.

  • A brief study on sharpening stones – Part 63 – Edge Pro DiamondMax 5 µm (Diamond, Resin)

    This is part of a series of blog posts – looking into the appearance and composition of commercially available sharpening stones. If you are interested in the previous episodes, check out the archive for them.

    If you have some suggestion on what I should look at next, or want to share your super secret DIY stones, I could be persuaded to open the bag of analytical devices… hit me up on Instagram under @marvgro for that.

    Disclaimer: I’m not for sale. Every review you see on this blog is bought with my own money. I have no affiliation to any manufacturer.

    Review

    In the last part of this series, we took a look at the brand new DiamondMax 80 Grit (160 µm) from Edge Pro. The review turned out to be quite the disappointment – the stone was suffering from heavy grain loss. Now, while it definitely is possible to make a resin stone at that grain size that works nicely, the main application of resin bond sharpening stones is the finishing – this is after all something where they shine. Our next look at this new series is the exact opposite end of the spectrum – the Diamond Max 4000 grit (5 µm). I’ve had a Diamond Matrix stone in a previous review.

    I’d advise you to check out my review on the 80 grit first:

    The manufacturer of the stones, David from CGSW has meanwhile commented under that blog post and given a more detailed insight into the increased diamond ratios. As this is very interesting, I’d like to quote him here:

    “To be clear, all Matrix stones have had more than 50% diamond to resin content by weight in them, and I have made every single one of them, so I can say this with confidence. The 80 grit Max stone has a 2.5 times higher concentration of diamonds, the 250 2.2 times higher, the 450 through 1700 have 2 times higher, and the 4000 1.8 times higher concentration of diamonds. For perspective, if they started out at 50/50, then 67/33 is double the concentration. I put the maximum amount of diamonds in the Max stones as is feasible for this resin. If I put more diamonds in this resin I run into processing problems.” David from CGSW, commenting on my blog (Part 62) on the 24th of May 2026

    This is clarifying a point, as it doesn’t mean these contain twice the amount of diamond, it just means the ratio has shifted – 67% by weight is after all just 35% more diamond.

    The original Diamond Matrix in 5 µm size is one of the stones I consider very, very good. My major issues back then was the slow speed – let’s take a look at the new DiamondMax in 5 µm!

    As always, we will start under the optical microscope:

    Optical micrographs of the Edge Pro Diamond Max 5 µm stone. Instrument: Marvscope

    The stone has a very homogeneous, regular appearance. The diamond can barely be made out at this magnification – just like I would expect of a 5 micron stone!

    Let’s take a closer look in the SEM:

    SEM micrographs of the Edge Pro Diamond Max 5 µm stone. Instrument: Zeiss GeminiSEM 560.

    We can see that this really is a high concentration stone! there’s diamond just about everywhere on the stone. No foreign particles jump out immediately. Unfortunately, just like with the 160 µm stone, some voids can be seen, and the remaining particles don’t show perfect, solid embedding either.

    Let’s look at the chemical composition! For this we are going to use an advanced SEM technique called EDS. If you want to know more about this, I’ve written extensively about SEM microanalysis here on this blog.

    EDS analysis of the Edge Pro Diamond Max 5 µm stone. Instrument: Oxford Ultim Max  ∞ 40mm2 EDS sensor. Note that our EDS sensor doesn’t show elements lighter than boron.

    The EDS definitely confirms the view – this is a LOADED stone. Lot’s of diamond. The distribution is good, but not perfect. Some foreign particles can be made out – those are ceramic particles from the manufacturers dressing.

    In order to evaluate the sharpening performance and material removal mode of this stone, a blade was sharpened with it. I am using a standardised testing procedure, read about it hereNevertheless, it’s 65 HRC M398, and sharpened to 17 DPS with resin bond diamond stones down to 10 µm. Afterwards, the tested stone is used, first in a back and forth movement until the surface becomes homogenous, and then alternating, edge trailing strokes (5-5-3-2) on each side, for a total of 20 strokes towards the apex per side. No pressure is applied but the weight of the apparatus. Moreover, the same approach is repeated with a blade in NitroV at 59-60 HRC.

    The edge is then analysed in the electron microscope for breakouts and morphological appearance.

    Let’s start with the harder steel – the M398 blade:

    SEM micrographs of the M398 edge finished with the Edge Pro Diamond Max 5 µm stone. Instrument: Zeiss GeminiSEM 560

    We get a good result here. The bevel is polished, shiny and the carbides are easily identified – typically a sure sign for higher polishing abilities! The apex is smooth, with very little damages visible. At higher magnifications (1kx, 5kx), once can see some scratches that very likely are from rolling, free grain. These are characterised by their appearance in the middle of the bevel – whereas embedded particles in the stone typically show up as scratches that go along the full length of the stone.

    A microscopic view of a cross-section of a material, showing distinct layers with fine textures. The scale bar at the bottom indicates 200 micrometres.

    Optical micrograph of the M398 bevel. Instrument: Marvscope

    Let us take a look at the surface height map:

    3D surface topography image illustrating a textured surface with varying heights, represented in colour from blue to red, alongside scale bars in micrometres and nanometres.

    3D surface height map of the M398 Bevel. Instrument: Zygo NewView 9000, Objective Lens: 20X. Metrological filter chain: LS-Plane to orient data, cutoff 0.1/99.9 percent to remove outliers.

    With the surface roughness parameters as follows:

    Sa0.00713µm
    Sq0.009512µm
    Ssk-0.8962
    Sku5.805

    ISO 25178 surface roughness parameters. S-Filter: 2.5 µm (gaussian), L Filter: 0.08 mm (gaussian). No F operation besides LSQ leveling.

    This is a very respectable result! A nanometric surface roughness, especially in the single digit range is a finely polished, mirror like surface.

    Let’s take a look at the NitroV edge:

    SEM micrographs of the NitroV edge. Instrument: Zeiss GeminiSEM 560

    The DiamondMax had a bit more issues on this steel – something that is often seen on soft diamond stones when used on softer, less high tech steels. Nevertheless, we get a fine apex, and a relatively smooth surface. Near the apex, more damage from rolling grain can be seen. The bevel on this test blade is a bit wider than on my M398, I’d guess that this allowed for more swarf to buildup.

    Microscopic image showing a finely textured surface with parallel grooves, marked with a scale bar indicating 200 micrometres.

    Optical micrograph of the NitroV bevel. Instrument: Marvscope

    Overall, this is a nicely working stone. Brand new, the stone felt very aggresive, but after the first “familiarising blade”, speed went down. On the tested blades, the stone was quick in the beginning, but got noticeably slower as swarf and loading build up.

    Comparison with the Diamond Matrix stone

    Now, let’s compare this to the proven and excellent Matrix 4000 – after all, this is the main question here: is it worth it to upgrade?

    Let’s take a look at identical condition microscopy pictures of the Diamond Matrix stone:

    SEM micrographs of the Edge Pro Diamond Matrix 5 µm stone. Instrument: Zeiss GeminiSEM 560.

    We can immediately make out a much lower diamond concentration.

    This is further confirmed in the EDS analysis:

    EDS analysis of the Edge Pro Diamond Max 5 µm stone. Instrument: Oxford Ultim Max  ∞ 40mm2 EDS sensor. Note that our EDS sensor doesn’t show elements lighter than boron.

    The view in the SEM is much more homogeneous than from the DiamondMax, with fewer “rolling grain” artifacts visible:

    Edge quality looks pretty much identical, but the surface morphology is more homogeneous.

    A black and white microscopic image showing the surface of a material with fine linear patterns and textures, taken at 10x magnification. A scale bar indicating 200 micrometres is included.

    This is further reflected in the 3D height map:

    3D surface profile of a material displayed in a colour gradient representing height variations, with marked axes for micrometre scale. The image features a colour bar indicating height in nanometres.

    The roughness is pretty much identical to the DiamondMax stone – I’d say there is no significant difference:

    Sa0.008447µm
    Sq0.01094µm
    Ssk-0.4306
    Sku4.170

    ISO 25178 surface roughness parameters. S-Filter: 2.5 µm (gaussian), L Filter: 0.25 mm (gaussian). No F operation besides LSQ leveling.

    Please check out my original review of the 4000 stone here:

    So, let us compare the results, side by side:

    Microscopic images comparing two samples, one displaying a textured surface with reddish-brown and green patterns, and the other showing a smoother, more uniform texture.

    Comparison between the new DiamondMax 5 µm (left side) and the “old” Diamond Matrix 5 µm (right side).

    The new DiamondMax stone definitely contains significantly more diamond. Moreover, it is build on the same “principles”, meaning it’s a very pure resin stone. According to the manufacturer, the resin hasn’t changed at all. The result is comparable in nature – the measured surface roughness is within the variance expected. The apex is comparable in quality. The DiamondMax feels ever so slightly faster, but I wouldn’t call it a significant difference. I feel like it looses more grains – this would go hand in hand with the manufacturers statement that it wears quicker, but also what we can identify as a slightly more irregular scratch pattern on a bevel due to rolling grains. Overall, I would say this is a minimal step forward in terms of speed, but it looses some of it’s quality by this. If I was you, I’d stick with the old Matrix 4000, this upgrade doesn’t look like it’s worth it.

    Just like in the last review, I want to draw the comparison with what a pure resin stone can do – and include results from my 5 µm sharpening stone here:

    SEM micrographs of a M398 edge finished with Dr. Marvs Scientific sharpening stone, 5 µm. Instrument: Zeiss GeminiSEM 560.

    It has a slightly cleaner, less wavy apex line. The surface in the SEM is comparable to the matrix stones. Optically, it’s much more homogeneous:

    Close-up view of a polished material surface, showing fine scratches and texture, with a scale bar indicating measurements in micrometres.

    Optical micrograph of the M398 blade finished with Dr. Marv’s 5 µm stone. Instrument: Marvscope

    In the 3D height map, we can identify fewer scratches and an overall smoother surface:

    3D surface topography image showing a textured surface with varying heights, represented in a colour gradient from blue to red, indicating measurements in nanometres, with axes labelled in micrometres.

    The surface roughness parameters are lower:

    Sa0.006707µm
    Sq0.008277µm
    Ssk0.2270
    Sku2.808

    ISO 25178 surface roughness parameters. S-Filter: 2.5 µm (gaussian), L Filter: 0.25 mm (gaussian). No F operation besides LSQ leveling.

    So, with a cheeky smile from my side: if you are looking to upgrade your Diamond Matrix 4000, I wouldn’t. It’s a fantastic stone. The new DiamondMax doesn’t differ significantly but in price. My 5 µm stone gives a cleaner result, but instead of buying my stone, I have a different suggestion for you:

    Spend that “upgrade money” on a nice dinner with a person who is important to you. It is better invested.

  • A brief study on sharpening stones – Part 62 – Edge Pro Diamond Max 160 µm (Diamond, Resin)

    This is part of a series of blog posts – looking into the appearance and composition of commercially available sharpening stones. If you are interested in the previous episodes, check out the archive for them.

    If you have some suggestion on what I should look at next, or want to share your super secret DIY stones, I could be persuaded to open the bag of analytical devices… hit me up on Instagram under @marvgro for that.

    Disclaimer: I’m not for sale. Every review you see on this blog is bought with my own money. I have no affiliation to any manufacturer.

    Review

    Today’s sharpening stone is the brand new, just released EdgePro Diamond Max! Rumors of these stones coming have been floating around for a couple of months already, and I have been very much itching to get my hands on one of these. The Edge Pro Matrix stones (also sold by the producer, CGSW) are considered some of the best sharpening stones on the market – rightfully so! I had their 5 µm Matrix stone on the blog quite some while ago. It gives a fantastic edge, polishes the bevel finely and I only had two major issues with it: it is probably the most expensive sharpening stone on the market by amount of abrasive you are buying, and the low concentration made that stone very slow.

    When they got launched in a silent reveal at the end of April, I didn’t hesitate a single second, eager to try it out and order 3 stones to Germany. Something I want to highlight here: the contact with the owner of EdgePro, Cody, was superb – I had a question about tracking and got a super polite, helpful email back. This, dear readers is why I advocate buying from small manufacturers, and ideally directly from them!

    Just two days ago, Cody uploaded a video on his youtube channel explaining about these stones. The new DiamondMax stones seem to adress the issue of speed, albeit this comes hand in hand with a major price bump (roughly 20$ increase on the stones, bringing this 160 µm / 80 grit stone to 107$ before taxes / import duties if you buy outside the US). The abrasive layer is still very thin. According to the manufacturer, these stones now contain between 1.8 and 2.5x more diamond, depending on their grit!

    Let’s take a look under the optical microscope!

    Optical micrographs of the stone. Instrument: Marvscope

    I absolutely love coarse sharpening stones under an optical microscope! There, one really can make out the grain and grain concentration. The stone has a high concentration of quite blocky diamonds, a natural appearance at that grit size. The grains tend to clump together in groups of 3-6 grains. In between the grains, we can see the white resin layer. Some much smaller, blue-blackish particles can be made out.

    I do not own a comparable size Diamond Matrix stone (hold your curiosity until I get around to the 5 µm review, there I can do a direct comparison!). The producer of the stones seems to still be CGSW, and he is very curious about my sharpening stones. In this thread on the bladeforums, David writes:

    “…Diamond Max series that didn’t go anywhere. I made 2 sets of Matrix stones with the most diamond in them that I could a few years ago. One for EP and one for me. They do cut a little faster but at the expense of wearing much faster. Even if they didn’t cost more they would be a lower value than the current Matrix stones so they didn’t make it to production.” Quote from user “Diemaker” on the bladeforums, accessed on Sunday, 24th of May 2026.

    Uff. Okay. That’s a hardcore statement to make about a product that is yet to launch.

    Let’s take a closer look in the SEM:

    SEM micrographs of the EdgePro DiamondMax 160 µm stone. Instrument: Zeiss GeminiSEM 560.

    Under the SEM, the blocky nature of the grains is further confirmed. Size seems to peak at 160µm, with the majority of grains slightly smaller (100-140 µm). It is normal that diamond powder is not a single size, a gaussian distribution is always expected. What I find very curious is the high amount of “voids”, where clear imprints of grains have sat before. This is the stone before use, and already a massive loss of grains can be made out. Zooming in on one grain, we can see that although the resin is confining the grain above it’s main diameter, it is already loose and there is some gap between the resin and the grain.

    Grain adhesion is the major issue in most resin stones, and it becomes more dominant the larger the grain becomes.

    Let’s look at the chemical composition! For this we are going to use an advanced SEM technique called EDS. If you want to know more about this, I’ve written extensively about SEM microanalysis here on this blog.

    EDS analysis of the EdgePro DiamondMax 160 µm stone. Instrument: Oxford Ultim Max  ∞ 40mm2 EDS sensor. Note that our EDS sensor doesn’t show elements lighter than boron.

    The stone shows the typical, very pure composition we already saw in the Matrix stones: There’s diamond in there, and an organic binder, with not much else. The black-blue grain we made out in the optical micrograph shows as an oxide-abrasive grain, mostly peaking on the Mg-Si-O channel. I would guess that this is some abrasive debris from their flattening process. It will probably disappear after a few sharpening cycles, leaving a pure stone behind.

    The impression that the diamond grain seems to clump together a bit is further confirmed in this image – we can see small nests of diamond.

    In order to evaluate the sharpening performance and material removal mode of this stone, a blade was sharpened with it. I am using a standardised testing procedure, read about it hereNevertheless, it’s 65 HRC M398, and sharpened to 17 DPS with resin bond diamond stones down to 10 µm. Afterwards, the tested stone is used, first in a back and forth movement until the surface becomes homogenous, and then alternating, edge trailing strokes (5-5-3-2) on each side, for a total of 20 strokes towards the apex per side. No pressure is applied but the weight of the apparatus. Moreover, the same approach is repeated with a blade in NitroV at 59-60 HRC.

    The edge is then analysed in the electron microscope for breakouts and morphological appearance.

    Something that became immediately apparent when using the DiamondMax stone, and was already suspected from the SEM pictures: this stone looses a lot of grains! Let me show you what I mean:

    Microscopic views of the loose grain /swarfs after 20 and 100 strokes with the stone. Instrument: 100x Macro Loupe on iphone 17 Pro Max

    Already on the first stroke (edge trailing), one could feel how grains would jump out. I counted to 20 strokes, and then did a picture of the bevel with my phone. You can see a frankly absurd amount of diamond – and very little swarf. Over the next 80 strokes, the stone picked up some speed, producing a lot of swarf, but also loosening even more grains. I cleaned it off, applied new lubricant and the same thing happened. Initial, hard grain loss, followed by an increase in material removal rate once there’s a certain “slush” going on. I’m a bit stumped by this wear rate – and frankly, if you sharpen any expensive knife, you do not want this massive amount of loose grains potentially scratching the surface.

    Let’s take a closer look at the result, and start with the harder steel – the M398 blade:

    SEM micrographs of the M398 edge finished with the EdgePro DiamondMax 160 µm stone. Instrument: Zeiss GeminiSEM 560

    We can see quite the ragged edge. The bevel shows clear signs of the rolling grain – deep scratches in the middle of the bevel, stopping and starting randomly.

    The overall appearance is diffuse and sligthly chaotic – this is because the rolling, loose grain can jump around, but also move sideways and not only in the direction of the sharpening stroke.

    Microscopic view of a metal surface showing fine linear textures and structures, with a scale bar indicating 200 micrometres.

    Optical micrograph of the M398 bevel. Instrument: Marvscope

    Which is further visible in the white light interferometer measurements of the bevel: a diffuse, marred surface:

    3D surface topography image showing textured patterns in various colours representing height variations, with a scale bar indicating measurements in micrometres.

    3D surface height map of the M398 Bevel. Instrument: Zygo NewView 9000, Objective Lens: 20X. Metrological filter chain: LS-Plane to orient data, cutoff 0.1/99.9 percent to remove outliers.

    The surface roughness is pretty rough, too:

    Sa0.3708µm
    Sq0.5017µm
    Ssk-0.7942
    Sku5.777

    ISO 25178 surface roughness parameters. S-Filter: 2.5 µm (gaussian), L Filter: 0.08 mm (gaussian). No F operation besides LSQ leveling.

    Overall, I’m quite disappointed. Let’s see whether the stone performs nicer in a softer, easier steel, and take a look at the NitroV edge:

    SEM micrographs of the NitroV edge. Instrument: Zeiss GeminiSEM 560

    In addition to the very rough, broken up surface, we can also detect some splintered pieces of diamond that have embedded themselves into the bevel.

    Microscopic view of a textured surface, featuring fine linear patterns and striations, with scale bar indicating 200 micrometres.

    Optical micrograph of the NitroV bevel. Instrument: Marvscope

    The surface looks a bit more irregular, with a massive amount of sideways or circular scratchmarks, caused by the grain rolling around freely in the abrasive/debris slush created.

    3D surface topography image showing textured patterns in a colour gradient, with height represented from 0 to 6.65 micrometres. Includes a legend indicating height measurements and a series of smaller images illustrating different views.

    3D surface height map of the NitroV Bevel. Instrument: Zygo NewView 9000, Objective Lens: 20X. Metrological filter chain: LS-Plane to orient data, cutoff 0.1/99.9 percent to remove outliers.

    The surface roughness deteriorates even more:

    Sa0.4595µm
    Sq0.6215µm
    Ssk-0.8645
    Sku5.439

    ISO 25178 surface roughness parameters. S-Filter: 2.5 µm (gaussian), L Filter: 0.08 mm (gaussian). No F operation besides LSQ leveling.

    Now, you might think at this point: why am I so disappointed? It’s a coarse stone, meant for quick material removal, and some grain shedding is expected, especially on resin stones.

    The problem is: it’s not. It can be done differently, it can be done better.

    Let me explain, and I’ll do so by something I do very rarely – a direct comparison. You see, I also make a resin stone with near identical grain size denomination, the Dr. Marv Scientific Sharpening stone in 150 µm. Let me pull you up an optical picture, side by side to the EdgePro Diamond Max in 160 µm:

    Identical magnification shots of (first picture) the Diamond Max 160 µm and (second picture) the Dr. Marv 150 µm stones.

    I will let you draw conclusions about the concentration yourself. Let us compare the results – this is the exact same M398 blade, sharpened with my stone:

    SEM micrographs of the M398 edge finished with Dr. Marv’s 150 µm resin stone. Instrument: Zeiss GeminiSEM 560

    The view of debris after 20 and 100 strokes:

    View of the swarf after 20 and 100 strokes, sharpened with Dr. Marv 150 µm resin stone.

    Optical micrograph of the bevel:

    Close-up microscopic image showing a metallic surface with fine linear scratches, demonstrating texture and detail, labelled with measurement scale.

    Optical micrograph of the M398 bevel. Instrument: Marvscope

    And last but not least, the WLI results:

    3D surface plot showing a textured surface with varying elevations in micrometres, colour-coded from blue to red, accompanied by a colour scale on the right indicating elevation levels.

    3D surface height map of the M398 Bevel. Instrument: Zygo NewView 9000, Objective Lens: 20X. Metrological filter chain: LS-Plane to orient data, cutoff 0.1/99.9 percent to remove outliers.

    With the surface roughness values being about 2.5x lower than on the EdgePro stone:

    Sa0.1481µm
    Sq0.1981µm
    Ssk-1.003
    Sku4.930

    ISO 25178 surface roughness parameters. S-Filter: 2.5 µm (gaussian), L Filter: 0.08 mm (gaussian). No F operation besides LSQ leveling.

    I typically end my reviews with a conclusion. I think none is needed here, but for completeness sake I’ll do one:

    The DiamondMax 80 grit stone seems to have a high diamond concentration. It is definitively not the maximum possible. Some agglomeration is apparent in micrographs and chemical analysis. Grain retention is nearly non existent on the stone, with large amounts of wear and free-rolling grain induced results on the blade. The stone is probably the most expensive diamond stone on the market if one takes the very thin arbasive layer into account. Results are matching these findings – marred, rough bevels and a ragged, wavy apex. The initial quote I pulled from David (CGSW) on the Bladeforums becomes very true:

    Even if they didn’t cost more they would be a lower value than the current Matrix stones

    And they even bumped the price.

  • A brief study on sharpening stones – Part 61 – FSK Vitrified #1000 (Diamond, Vitrified)

    This is part of a series of blog posts – looking into the appearance and composition of commercially available sharpening stones. If you are interested in the previous episodes, check out the archive for them.

    If you have some suggestion on what I should look at next, or want to share your super secret DIY stones, I could be persuaded to open the bag of analytical devices… hit me up on Instagram under @marvgro for that.

    Disclaimer: I’m not for sale. Every review you see on this blog is bought with my own money. I have no affiliation to any manufacturer.

    Review

    Today’s sharpening stone is once again something very special – it’s the wonderfully finished, presented and made FSK Vitrified #1000 Diamond stone. In a previous part, we’ve had the #270 grit of this series, and just like in that review, the finish, packaging and presenting of the stone is fantastic. Be sure to check the #270 out here:

    Just like the #270 grit, this is really expensive premium stone – with taxes and import duties, it was just above 600 Euro, delivered to my doorstep in Germany.

    Let’s take a look under the optical microscope!

    Optical micrographs of the FSK vitrified #1000 diamond stone. Instrument: Marvscope

    The stone is a lighter colour than it’s #270 grit brother. Less of a green appearance, which is usually typical of finer diamond grits. The stone is nearly transparent, with a high degree of vitrification in the bond.

    Let’s take a closer look in the SEM:

    SEM micrographs of the FSK vitrified #1000 diamond stone. Instrument: Zeiss GeminiSEM 560.

    The surface is very regular, and once again shows small bubble like voids. The diamond grit is distributed all over, with a blocky, high quality diamond predominant. FSK seems to use very high quality raw material to make this stone! The diamonds are firmly embedded in the bond, and the actual vitrified matrix looks extremely dense and compact.

    Let’s look at the chemical composition! For this we are going to use an advanced SEM technique called EDS. If you want to know more about this, I’ve written extensively about SEM microanalysis here on this blog.

    EDS analysis of the FSK Vitrified #1000 diamond stone. Instrument: Oxford Ultim Max  ∞ 40mm2 EDS sensor. Note that our EDS sensor doesn’t show elements lighter than boron.

    EDS analysis shows a super regular distribution of the diamond. Concentration should be a bit higher if you ask me, but the mixing seems to be absolutely top notch. It feels like I’ve seldom had such good distribution on a diamond stone.

    In order to evaluate the sharpening performance and material removal mode of this stone, a blade was sharpened with it. I am using a standardised testing procedure, read about it hereNevertheless, it’s 65 HRC M398, and sharpened to 17 DPS with resin bond diamond stones down to 10 µm. Afterwards, the tested stone is used, first in a back and forth movement until the surface becomes homogenous, and then alternating, edge trailing strokes (5-5-3-2) on each side, for a total of 20 strokes towards the apex per side. No pressure is applied but the weight of the apparatus. Moreover, the same approach is repeated with a blade in NitroV at 59-60 HRC.

    The edge is then analysed in the electron microscope for breakouts and morphological appearance.

    Let’s start with the harder steel – the M398 blade:

    SEM micrographs of the M398 edge finished with the FSK vitrified #1000 diamond stone. Instrument: Zeiss GeminiSEM 560

    The bevel has a slightly toothed edge, with a clearly folded over (facing away from the viewing direction) burr. The bevel surface morphology is super regular – there’s close to no deep scratches.

    This is further visible in the optical micrograph: A toothy edge, that is super homogeneous albeit matte in it’s appearance.

    A close-up, high-resolution image of a material surface, showcasing a textured pattern with fine lines and variations. The scale bar indicates measurements in micrometres.

    Optical micrograph of the M398 bevel. Instrument: Marvscope

    The WLI measurements show this exact situation. The blade is diffuse, not super smooth, but very regular. A large, multi micron burr exists on the apex.

    3D topographic representation of a surface, showing textured features with varying heights, measured in micrometers.

    3D surface height map of the M398 Bevel. Instrument: Zygo NewView 9000, Objective Lens: 20X. Metrological filter chain: LS-Plane to orient data, cutoff 0.1/99.9 percent to remove outliers.

    The surface roughness parameters reflect this. It is an acceptable surface roughness for a #1000 stone.

    Sa0.2741µm
    Sq0.4098µm
    Ssk-0.4744
    Sku11.90

    ISO 25178 surface roughness parameters. S-Filter: 2.5 µm (gaussian), L Filter: 0.25 mm (gaussian). No F operation besides LSQ leveling.

    Let’s take a look at the NitroV edge:

    SEM micrographs of the NitroV edge. Instrument: Zeiss GeminiSEM 560

    The NitroV bevel, shows a larger burr, but also an even more homogeneous surface. I actually love the matte, diffuse finish created here. There are quite a few much deeper scratches, but again they are so well distributed that they don’t really mar the surface.

    The large >10 µm burr is visible in the optical micrograph as well:

    Micrograph showing a high-resolution image of a textured surface with vertical lines, including a scale bar indicating 200 micrometres.

    Optical micrograph of the NitroV bevel. Instrument: Marvscope

    And facing upwards in the WLI interferometric picture, we can really see that it is nicely bend over. This is an easily detectable burr, which definitely needs to be removed before a sharp apex is achieved.

    3D surface plot of a textured material showing varying heights represented in a blue and green colour gradient, with measurements in micrometres along the axes.

    3D surface height map of the NitroV Bevel. Instrument: Zygo NewView 9000, Objective Lens: 20X. Metrological filter chain: LS-Plane to orient data, cutoff 0.1/99.9 percent to remove outliers.

    The deeper scratches are reflected in the quantitative surface roughness parameters:

    Sa0.6563µm
    Sq1.069µm
    Ssk0.4803
    Sku14.61

    ISO 25178 surface roughness parameters. S-Filter: 2.5 µm (gaussian), L Filter: 0.25 mm (gaussian). No F operation besides LSQ leveling.

    The stone itself is blissful to use. It’s got fantastic feedback, is very hard, doesn’t seem to wear at all, requires next to no soaking, just regular reapplication of water. I know this stone was hyped as a wonderful freehand benchstone on the internet, and I can definitely understand it. It is well made, the results are decent, the finish is immaculate if one wants a matte, diffuse surface. I only feel that the burr created is too large for this grain size. The major downside is the limited availability and high price. It kind of feels like one can get a similar result from a sharpening stone 5x cheaper, albeit without the wonderful design, packaging and vitrified feel.

    I like this stone and just like the Shapton glass, it will become a regularly used sharpening stone when I partake in sharpening as a hobby!

  • A brief study on sharpening stones – Part 60 – Dr. Marv’s Wunderlubrikant (Liquid, Oil)

    This is part of a series of blog posts – looking into the appearance and composition of commercially available sharpening stones. If you are interested in the previous episodes, check out the archive for them.

    If you have some suggestion on what I should look at next, or want to share your super secret DIY stones, I could be persuaded to open the bag of analytical devices… hit me up on Instagram under @marvgro for that.

    Disclaimer: I’m not for sale. Every review you see on this blog is bought with my own money. I have no affiliation to any manufacturer. This review is about a product I’m selling, so you can consider this an advertisement where the local jurisdiction requires me to state this.

    Review

    Today we’re going to take a look not at a stone, but something that goes on a stone. By popular demand, I proudly present: Dr. Marv’s Wunderlubrikant.

    A hand holding a container labelled 'Dr. Marv's Wunder Lubrikant' in a workspace with various tools and strips laid out on a surface.

    Since I started my own sharpening stone series, the number 1 most asked question was what lubrikant to use with it. I typically answered with “any high quality honing oil will do”, but the one sold by hapstone seems to be horrible, and industrial ones are very hard to source as they are not meant for B2C series. To answer this demand, I worked together with my good friends from the German high tech lubricant company oelheld to get all the legal stuff done so I could sell bottles of the “Wunderlubrikant”. It really was a massive effort, and I also don’t really like selling and stocking oil, so this is first and foremost a service to the sharpening community. When I started in sharpening, I tried many of the “home use” liquids suggested by the communities, but also a lot of industrial high tech solutions. What one wants from a lubricant in hand guided sharpening is the following:

    1.) Reduce loading on the stone

    2.) Bind the swarf so it’s not becoming an aerosol

    3.) Ideally help with the cutting action and improve surface finish / lower surface roughness

    In order to test and benchmark, I sharpened with 3 brandnew 30 µm diamond stones (my own resin stones). One was used with soapy water, one with mineral oil and one with the Wunderlubrikant. A decent layer of the lubricant was added. In the case of soapy water, the application was re-applied every 50 strokes to combat it running off and evaporating. The stone never got dry.

    Close-up of a reflective surface on a device with accessories and tools in the background.

    Applied coating of the “wunderlubrikant” on the 30 µm stone.

    Each stone did 200 strokes on the brandnew, dressed stones. A picture of the stone surface before and after wiping it off vigorously with a tissue was recorded. This shows the tendency to load.

    Photographs of the “stone loading test”. 200 strokes on M398, with a layer of the tested lubricants applied. Residue after wiping off and the tissue used.

    I do believe the images speak for themselves – the tendency to load is massively reduced through the Wunderlubrikant. The all time classics fall very much short.

    Afterwards, I dressed the stones anew and then sharpened 3 NitroV blades. Here, I first used the 30 µm stone with the lubricant to completeley remove the scratch pattern from the previous stone. Then I changed the movement angle of the stone (by about 60°) and did 100 strokes. This is to show both the surface finish, but also the “speed” at which the stone is working. Ideally, no scratches form the previous movement direction are visible, and the bevel is smooth. The blades were analysed via scanning electron microscopy, but also the bevel roughness measured with our fantastic Zygo white light interferometer.

    Let’s start with the Wunderlubrikant:

    SEM micrographs of the bevel surface after sharpening with the Wunderlubrikant. Instrument: Zeiss GeminiSEM 560

    The bevel sharpened with the wunderlubrikant shows a super regular, very even appearance. Macroscopically, the tracks left by the individual grains go over the full FOV. Zooming in even further, a very smooth surface with a low tendency for ploughing or burr formation is shown.

    3D surface topography image displaying colour-coded height variations, with the z-axis representing height in nanometres (nm) and the x and y axes in micrometres (μm).

    3D surface height map of the NitroV Bevel sharpened with the Wunderlubrikant. Instrument: Zygo NewView 9000, Objective Lens: 20X. Metrological filter chain: LS-Plane to orient data, cutoff 0.1/99 percent to remove outliers.

    The 3D height map shows this as well: a very flat, even bevel. There is no noticeable falloff or convexing of the bevel.

    Of special interest is the surface roughness:

    Sa0.0402nm
    Sq0.0564µm
    Ssk-0.3263
    Sku6.515

    ISO 25178 surface roughness parameters. S-Filter: 2.5 µm (gaussian), L Filter: 0.25 mm (gaussian). No F operation besides LSQ leveling.

    The surface values already approach a polished surface – a certain gloss is visible on the blade.

    Close-up view of a textured surface under microscope, showing linear patterns and markings. Scale bar indicates 200 micrometres.

    Optical micrograph of the NitroV bevel sharpened with the Wunderlubrikant. Instrument: Marvscope

    Next, let’s take a look at the soapy water. It is after all the lubricant probably everyone has at home!

    SEM micrographs of the bevel surface after sharpening with the soapy water. Instrument: Zeiss GeminiSEM 560

    The surface is marred by some residual scratches from the previous grinding direction. Moreover, the surface shows at 5kx magnification some signs of plowing of the grain. Instead of cutting through the material, plastic deformation happens – the surface is sligthly burnished, and thus produces these flowy prows on the side of the tracks. Some deeper scratches are also visible.

    3D surface roughness map showing colour gradients representing height variations on a textured surface, with a scale bar indicating micrometre measurements.

    3D surface height map of the NitroV Bevel sharpened with soapy water. Instrument: Zygo NewView 9000, Objective Lens: 20X. Metrological filter chain: LS-Plane to orient data, cutoff 0.1/99 percent to remove outliers.

    Surprisingly, the bevel shows some convexing towards the apex! This is only about 2 micrometre in height, but quite suprising to me. Moreover, the surface roughness is significantly higher (about 2x):

    Of special interest is the surface roughness:

    Sa0.1046µm
    Sq0.1513µm
    Ssk-1.618
    Sku6.982

    ISO 25178 surface roughness parameters. S-Filter: 2.5 µm (gaussian), L Filter: 0.25 mm (gaussian). No F operation besides LSQ leveling.

    The optical micrograph supports this: The apex was hit, but some residual scratches from the previous movement direction are clearly visible. Overall, because of the loading, the material removal speed sharply dropped.

    Close-up view of a surface texture captured under an optical microscope, showing fine lines and patterns, with a scale bar indicating measurements in micrometres.

    Optical micrograph of the NitroV bevel sharpened with soapy water. Instrument: Marvscope

    Last but not least, the mineral oil. Mineral oil is popular, because it is available in a “food safe” version. I’m not sure why people are so focused on that property – don’t you wash your knives after sharpening?!? I personally don’t want to eat swarf 🙂

    SEM micrographs of the bevel surface after sharpening with mineral oil. Instrument: Zeiss GeminiSEM 560

    The surface shows the same, irregular residual scratches as the bevel from the soapy water did. Moreover, we have some random, deep scratches that look like they were created by rolling debris/grains.

    3D surface plot displaying topographical data with colour gradient representing surface height in micrometres (µm). The plot features intricate patterns in red, green, and blue, indicating variations in elevation.

    3D surface height map of the NitroV Bevel sharpened with the Wunderlubrikant. Instrument: Zygo NewView 9000, Objective Lens: 20X. Metrological filter chain: LS-Plane to orient data, cutoff 0.1/99 percent to remove outliers.

    This is further confirmed in the 3D height map, where a slight convexing (about 1.5 micrometre) is also visible. Moreover, the cutting edge is quite ragged.

    The surface roughness is lower than with soapy water, but higher than with the Wunderlubrikant.

    Sa0.07706µm
    Sq0.1100µm
    Ssk-1.113
    Sku6.712

    ISO 25178 surface roughness parameters. S-Filter: 2.5 µm (gaussian), L Filter: 0.25 mm (gaussian). No F operation besides LSQ leveling.

    The random scratches are easy to make out in the optical micrograph. Because of their random direction, but also the SEM morphology, they seem to be rolling debris or loosened grains.

    Microscopic image showing a textured surface with fine fibres, displaying a scale bar indicating 200 micrometres.

    Optical micrograph of the NitroV bevel sharpened with mineral oil. Instrument: Marvscope

    I hestitate with a conclusion, because the differences are so dramatic, so clear, and this is my own product. I can already hear people scream “he just wants to push people to buy his product!!!1111”. Frankly, I am very happy with NOT shipping individual bottles of oil all over the planet. It’s a massive pain to bottle oil manually, and the German legislation on bringing a liquid on the market is so obscure, that the effort in getting this done will never make this a profitable product. Nevertheless, every review gets a conclusion:

    The Wunderlubrikant showed a significant, superior result: Not only was loading massively reduced and easily wiped off. The removal speed was by far the highest, the bevel had the lowest roughness, cleanest cutting action and nicest surface morphology.

    Soapy water had the worst loading – so much that I would probably recondition the stone after every 2 bevels, something I do with my regular, Wunderlubrikant applied stones every few months. The surface roughness was high, and clear smearing/plastic deformation was visible.

    Mineral oil sits somewhere in between, but still falls significantly short, especially in terms of loading on the stone.

    If you allow me to expand why Wunderlubrikant performs this well:

    An often overlooked property of lubricants is the load bearing. This is the phyiscal property on how much pressure leads to a collapse ( = rupture) of the oil film. A good lubricant acts like miniature “bearings” around the cutting edge – allowing the abrasive to cut, instead of smear, and reduce friction. This only works, if the lubricant can stay on the abrasive grain as a, few molecules thick layer, even under the pressure of the sharpening/grinding action. The Wunderlubrikant is a specifically designed high tech MQL oil on an ester basis. It’s highly lubricating, but also has a fantastic load bearing property.

    Oh, and regarding safety:

    I’ve exposed my stones for several months to the Wunderlubrikant. Moreover, most of the stones in this blog were reviewed with this specific lubricant. No delamination, deconstruction or damage to any resin bonds has been observed.

    This product is non-hazardous and does not meet the criteria for classification as a dangerous good under GHS (Globally Harmonized System) regulations, IATA, IMDG, or ADR standards. It requires no special handling, contains no restricted substances, and is intended for personal use. Because of this, I can even ship it internationally. Because it’s ester based, it even washes off without residue with water. No solvents needed.

    Still, I wouldn’t eat it if I was you.

    Dr. Marv’s Wunderlubrikant is available in my online shop:

  • A brief study on sharpening stones – Part 59 – Jende Resin 30 µm (Diamond, Resin

    This is part of a series of blog posts – looking into the appearance and composition of commercially available sharpening stones. If you are interested in the previous episodes, check out the archive for them.

    If you have some suggestion on what I should look at next, or want to share your super secret DIY stones, I could be persuaded to open the bag of analytical devices… hit me up on Instagram under @marvgro for that.

    Disclaimer: I’m not for sale. Every review you see on this blog is bought with my own money. I have no affiliation to any manufacturer.

    Review

    Today’s sharpening stone is another Jende resin stone. We’ve had it’s larger brother, the 120 µm on this blog before – check it out here.

    This episode, we’ll dig into the 30 µm stone. It’s a light colour, showing a mixed-abrasive appearance to the naked eye.

    Let’s take a look under the optical microscope!

    Optical micrographs of the Jende 30 µm resin stone. Instrument: Marvscope

    The stone itself shows quite the irregular composition – there’s areas that are more yellow-ish in colour, some very white spots, but also black particles interspersed. Moreover, even before use, the stone feels very friable – rubbing your finger along it, it has a lot of feedback and bite, but just doesn’t feel fully solid.

    Let’s take a closer look in the SEM:

    SEM micrographs of the Jende 30 µm resin stone. Instrument: Zeiss GeminiSEM 560.

    The stone has a lot of abrasives grains in it – there’s certainly some diamond, but also some oxide particles in different sizes visible. The diamond particles don’t really look very homogeneous in size – I’d postulate from the pictures that this stone exhibits a quite large spread in particle size.

    Some grains show clear delamination from the binder already – very curios! Remember, this is always before actually using the stone.

    Let’s look at the chemical composition! For this we are going to use an advanced SEM technique called EDS. If you want to know more about this, I’ve written extensively about SEM microanalysis here on this blog.

    EDS analysis of the Jende 30 µm resin stone. Instrument: Oxford Ultim Max  ∞ 40mm2 EDS sensor. Note that our EDS sensor doesn’t show elements lighter than boron.

    The stone itself is a mix between diamond particles – the feeling that the size differs wildly is confirmed here. Particles approach nearly 50 microns at the upper end, but there is also diamond particles in the sub 10 micrometre size. The distribution of the diamond is less well done than on the 120 µm stone, too. Moreover, the stone has large and small ceramic particles in it, of different species. There is some Mg-Si-O, but also some pure Al2O3 particles. Again, there’s quite a bit of sodium particles – very curious! The stone overall is a colourful one, with lots of different elements in it. Pretty!

    In order to evaluate the sharpening performance and material removal mode of this stone, a blade was sharpened with it. I am using a standardised testing procedure, read about it hereNevertheless, it’s 65 HRC M398, and sharpened to 17 DPS with resin bond diamond stones down to 10 µm. Afterwards, the tested stone is used, first in a back and forth movement until the surface becomes homogenous, and then alternating strokes (5-5-3-2) on each side, for a total of 20 strokes towards the apex per side. No pressure is applied but the weight of the apparatus. Moreover, the same approach is repeated with a blade in NitroV.

    The edge is then analysed in the electron microscope for breakouts and morphological appearance.

    The stone itself exhibits an exorbitant amount of feedback – but is super friable. Even after just a couple of strokes, it starts to form a slurry of abrasive particles on the blade. This slurry of course boosts material removal rate -but the rolling abrasive grains also mar the surface. Moreover, when wiping off the residue, there’s a high chance to scratch the blade, and if one doesn’t clean it properly, there’s certainly the chance to contaminate subsequent sharpening stones with the residue particles.

    Let’s start with the harder steel – the M398 blade:

    SEM micrographs of the M398 edge finished with the Jende 30 µm resin stone. Instrument: Zeiss GeminiSEM 560

    The surface shows clear signs of that friable stone nature – the surface morphology is dominated by pitting, burrs and prows on the bevel. Moreover, the apex is not really refined nor much finer than on the 120 µm stone. A large number of black particles embedded into the blade can also be made out – these are typically in the sub 5 µm range.

    This translates into a very matte look for the bevel, and a toothy edge:

    Microscopic image showing a textured surface with fine scratches and variations in light and dark shades, representing a section of material at 10X magnification.

    Optical micrograph of the M398 bevel. Instrument: Marvscope

    Which is further visible in the white light interferometer measurements of the bevel: a diffuse, marred surface:

    3D surface profile of a textured material, showing varying heights represented in a colour gradient from red to blue, indicating elevation in micrometres.

    3D surface height map of the M398 Bevel. Instrument: Zygo NewView 9000, Objective Lens: 20X. Metrological filter chain: LS-Plane to orient data, cutoff 0.1/99.9 percent to remove outliers.

    On popular demands (thanks to Branislav for requesting this!) I’ll include surface roughness parameters for the bevels:

    Sa0.3792µm
    Sq0.5065µm
    Ssk-0.7194
    Sku4.913

    ISO 25178 surface roughness parameters. S-Filter: 2.5 µm (gaussian), L Filter: 0.25 mm (gaussian). No F operation besides LSQ leveling.

    Let’s take a look at the NitroV edge:

    SEM micrographs of the NitroV edge. Instrument: Zeiss GeminiSEM 560

    The softer steel shows even more signs of plastic deformation through large rolling grains. There’s also deeper scratches, as the softer matrix doesn’t resist the larger ceramic oxide particles as well as the M398 steel does.

    A much higher number of black particles made me curious – so I bumbed the voltage of the SEM and did another SEM analysis, this time focused on one of these particles.

    The curious black particles we find embedded into the blade are pieces of diamond, that because of the friable nature of the sharpening stone are rolling around, and then embedding into the blade:

    Screenshot of an EDS-SEM software interface displaying layered imaging in various colours, with a main image and multiple smaller maps showing elemental analysis.

    EDS analysis of a particle embedded into the blade. Instrument: Oxford Ultim Max  ∞ 40mm2 EDS sensor. Note that our EDS sensor doesn’t show elements lighter than boron.

    The surface sometimes also shows much deeper scratches – I would imagine this comes from a > 30 µm particle becoming loose and dragging through the surface before going over the edge and accumulating on the second side of the bevel.

    Monochrome microscopic image showing a textured surface with fine lines and patterns, likely of a material sample, with a scale bar indicating 200 micrometres.

    Optical micrograph of the NitroV bevel. Instrument: Marvscope

    WLI confirms the existence of deeper scratches on this bevel:

    3D surface topography image depicting a textured surface with varying heights, using a colour gradient to represent different elevations in micrometres.

    3D surface height map of the NitroV Bevel. Instrument: Zygo NewView 9000, Objective Lens: 20X. Metrological filter chain: LS-Plane to orient data, cutoff 0.1/99.9 percent to remove outliers.

    With the surface parameters also taking a small dip and being slightly coarser/rougher:

    Sa0.4167µm
    Sq0.5606µm
    Ssk-0.9312
    Sku5.064

    ISO 25178 surface roughness parameters. S-Filter: 2.5 µm (gaussian), L Filter: 0.25 mm (gaussian). No F operation besides LSQ leveling.

    Overall, this is a quick acting stone. If you have tried adding abrasive paste (for example CBN paste) to a stone before, you have experienced that loose abrasive really boosts material removal rate. At the same time, at 30 micrometre, properties I look for edge refinement, removal of scratches and general increases in sharpness. Because of the highly friable nature of this stone, bad grain adhesion, insufficient mixing, mediocre particle size control and large ceramic oxide particles in it, the performance of this stone is overall very mediocre.

    I think at this price point, there are plenty of higher performing alternatives out there. A pity, because the feedback for sure is nice!

  • A brief study on sharpening stones – Part 58 – KMFS Diaresin #1000 (Diamond, Resin)

    This is part of a series of blog posts – looking into the appearance and composition of commercially available sharpening stones. If you are interested in the previous episodes, check out the archive for them.

    If you have some suggestion on what I should look at next, or want to share your super secret DIY stones, I could be persuaded to open the bag of analytical devices… hit me up on Instagram under @marvgro for that.

    Disclaimer: I’m not for sale. Every review you see on this blog is bought with my own money. I have no affiliation to any manufacturer.

    Review

    Today’s sharpening stone is the new KMFS Diaresin stone. I’m a bit jealous – diaresin is a really cool brand name for a sharpening stone! KMFS is well known for their sharpening devices – I’ve had reviews of their mechanisms on the blog before (Vantaedge and the Sensei).

    Let’s take a look under the optical microscope!

    Optical micrographs of the KMFS Diaresin #1000 stone. Instrument: Marvscope

    The stone has an intense, green colour. It’s not super homogeneous in the colour, and because it’s a relatively coarse stone, even at low magnification, the diamonds can be made out. The resin itself is quite crumbly – we can see there’s not a lot of sintered interconnection between the particles, even at low magnifications.

    Let’s take a closer look in the SEM:

    SEM micrographs of the KMFS Diaresin #1000 stone. Instrument: Zeiss GeminiSEM 560.

    The SEM shows that not only are there major block particles on the stone, but also a covering of very fine, sub micron particles in the mix. Inside the stone matrix, we can make out a decentl distribution and also decent concentration of diamond grains, but also other, sligthly larger grains. The stone in itself is not super homogeneous, there are some regions that look a bit different to the overall structure.

    Let’s look at the chemical composition! For this we are going to use an advanced SEM technique called EDS. If you want to know more about this, I’ve written extensively about SEM microanalysis here on this blog.

    EDS analysis of the KMFS Diaresin #1000 stone. Instrument: Oxford Ultim Max  ∞ 40mm2 EDS sensor. Note that our EDS sensor doesn’t show elements lighter than boron.

    Elemental analysis confirms the decent concentration of diamond. Moreover, the stone contains a large number of silicon particles – I’m not 100% sure why no other elemental channel appears in the regions where silicon is predominant, I would have expected the grains to be either silicon carbide or silicon oxide – pure silicon would be a very novel choice as an additive filler for a sharpening stone. Maybe the manufacturer has some idea? I do know that he is an avid reader of this blog 🙂

    There is also an explanation for the bright green colour of the stone – the small, sub micron particles appear to be chromium oxide. Last but not least, a small amount of sodium oxide rich particles are distributed over the stone. The EDS analysis can’t detect hydrogen, so it’s unclear whether this really is soda – again, a curious result in a non-ceramic stone.

    In order to evaluate the sharpening performance and material removal mode of this stone, a blade was sharpened with it. I am using a standardised testing procedure, read about it hereNevertheless, it’s 65 HRC M398, and sharpened to 17 DPS with resin bond diamond stones down to 10 µm. Afterwards, the tested stone is used, first in a back and forth movement until the surface becomes homogenous, and then alternating strokes (5-5-3-2) on each side, for a total of 20 strokes towards the apex per side. No pressure is applied but the weight of the apparatus. Moreover, the same approach is repeated with a blade in NitroV.

    The edge is then analysed in the electron microscope for breakouts and morphological appearance.

    During the sharpening action, the stone exhibited a lot of feedback. While it is quite hard in the sense that it is difficult to cut into the stone, it is also crumbly and slowly disintegrated, creating a swarf/debris, similar to how one gets on a natural stone. This increased the feedback, and gave the sharpening motion a “gritty” feel. Fun fact: according to the manufacturers homepage, it’s fine to use this stone with WD-40!

    Let’s start with the harder steel – the M398 blade:

    SEM micrographs of the M398 edge finished with the KMFS Diaresin #1000 stone. Instrument: Zeiss GeminiSEM 560

    The stone left a very matte finish on the blade. Lots of small micro serations and burrs are apparent – the apex itself is very burr free but also rounded over. There are some loose diamonds which have embedded themselves into the steel matrix; this was expected seeing how the stone created an abrasive debris slush during the sharpening action.

    Close-up black and white image of a textured surface, showing fine scratches and patterns under magnification, with scale indicator for reference.

    Optical micrograph of the M398 bevel. Instrument: Marvscope

    The optical micrograph confirms this – a very matte, very regular appearance. The edge is sligthly toothy.

    Let’s take a look at the NitroV edge:

    SEM micrographs of the NitroV edge. Instrument: Zeiss GeminiSEM 560

    While the NitroV bevel also shows burrs and prows along the bevel, and definite signs of diamond particles that rolled and imprinted, the overall finish is sligthly better in the softer steel. The apex is also not super sharp, but less rounded over than on the M398 blade.

    Close-up micrograph showing a cross-section of a material with distinct linear patterns, highlighting texture and surface features, including a scale marker for reference.

    Optical micrograph of the NitroV bevel. Instrument: Marvscope

    The bevel here is once again homogeneous, and slightly toothed.

    Overall, the stone leaves me with mixed feelings. It’s a thick stone, but slightly thinner than the market standard (22 mm wide vs 25 mm). Feedback is okay, and the sharpening result is within the expectation for a 1000 grit stone. I think it could be majorly improved by better sintering, to give it better grain adhesion and a slightly firmer structure. The addition of chromiumoxide makes it pretty, but doesn’t really add anything to the result. The stone itself is very affordable, at the time of this review it was sold below 40 €. This makes it an absolute bargain. KMFS is, just like with their sharpening mechanisms, continuing to bring affordable products to the market. I can only applaud that!

  • A brief study on sharpening stones – Part 57 – Jende Resin 120 µm (Diamond, Resin)

    This is part of a series of blog posts – looking into the appearance and composition of commercially available sharpening stones. If you are interested in the previous episodes, check out the archive for them.

    If you have some suggestion on what I should look at next, or want to share your super secret DIY stones, I could be persuaded to open the bag of analytical devices… hit me up on Instagram under @marvgro for that.

    Disclaimer: I’m not for sale. Every review you see on this blog is bought with my own money. I have no affiliation to any manufacturer.

    Review

    Today’s sharpening stone is the Jende Resin 120 µm. I have no idea why it took me this long to get around making a review of a Jende stone – I even got asked by avid readers whether I have some conflict with them. Honestly? They never were on my radar, but by popular request (which in turn raised my interest) I ordered some. Jende is an american company and has been making sharpening equipment for quite some time already. My order shipped from their Taiwan factory, which is a pity – I had hoped that an American company would actually produce in America, but I guess this is not the case for the full range of products they offer.

    Let’s take a look under the optical microscope!

    Optical micrographs of the Jende Resin 120 µm stone. Instrument: Marvscope

    The stone is a curious, yellow colour. It’s fixed to a steel blank, making the whole abrasive very heavy. We can make out parts that are very flat and even, and others where the stone looks a bit more porous. The diamonds appear very white in colour – this is quite curious, as most diamond powders are actually slightly greenish in colour. The size in optical micrographs looks to be a bit on the smaller size, but I always find it very difficult to correctly measure resin stone diamond sizes optically, as the resin covers the stone partially and contrast to the resin is also horrible.

    Let’s take a closer look in the SEM:

    SEM micrographs of the Jende Resin 120 µm stone. Instrument: Zeiss GeminiSEM 560.

    The stone has quite a few different sized abrasives in it. We can make out large, flat chunks, but also many smaller, blocky, angular grains here. There’s quite a few voids, which have a “glassy” or smeared appearance to them – a sign that these are pores from the manufacturing process, and not lost grains. The resin itself looks like a phenolic type resin, with a very small, gritty look to it.

    Let’s look at the chemical composition! For this we are going to use an advanced SEM technique called EDS. If you want to know more about this, I’ve written extensively about SEM microanalysis here on this blog.

    EDS analysis of the Jende Resin 120 µm stone. Instrument: Oxford Ultim Max  ∞ 40mm2 EDS sensor. Note that our EDS sensor doesn’t show elements lighter than boron.

    The EDS analysis shows that the large, flat particles are actually the diamond. They are well within their nominal size – so the appearance on the optical microscope was, as I postulated, misleading. From a chemical composition point of view, we can make out the diamond in some clusters – mixing could be a little bit improved if you ask me. The smaller, blocky abrasive grains are aluminium oxide – and they are very well distributed all over the stone, as well as much smaller than the diamond grit. There will be future reviews on finer Jende stones, it will be very interesting to see whether the Al2O3 is the same size throughout the series.

    In order to evaluate the sharpening performance and material removal mode of this stone, a blade was sharpened with it. I am using a standardised testing procedure, read about it hereNevertheless, it’s 65 HRC M398, and sharpened to 17 DPS with resin bond diamond stones down to 10 µm. Afterwards, the tested stone is used, first in a back and forth movement until the surface becomes homogenous, and then alternating strokes (5-5-3-2) on each side, for a total of 20 strokes towards the apex per side. No pressure is applied but the weight of the apparatus. Moreover, the same approach is repeated with a blade in NitroV.

    The edge is then analysed in the electron microscope for breakouts and morphological appearance.

    Let’s start with the harder steel – the M398 blade:

    SEM micrographs of the M398 edge finished with the Jende Resin 120 µm. Instrument: Zeiss GeminiSEM 560

    Overall, the stone did a decent job. The apex is refined, albeit not insanely sharp. Material removal was quick and consistent. The bevel surface structure shows a mix between real cutting action as well as ploughing of the grains, forming some micro prows and burrs. Some deeper, random scratches are visible.

    Close-up micrograph of a material's surface, displaying fine, textured lines and patterns with a scale bar indicating 200 micrometres.

    Optical micrograph of the M398 bevel. Instrument: Marvscope

    I’ve recently gotten access to a wonderful white light interferometer – a Zygo Newview 9000. I’ll try, as time permits, to include 3D scans of the bevel in future reviews, starting with this one:

    3D surface topography of a sample, showing green and blue colour gradients representing height variations measured in micrometers.

    3D surface height map of the M398 Bevel. Instrument: Zygo NewView 9000, Objective Lens: 20X. Metrological filter chain: LS-Plane to orient data, cutoff 0.1/99.9 percent to remove outliers.

    We can see the impression from the SEM pictures validated, but also get some quantifiable numbers. The deeper scratches are in a low, single digit micrometre range. I would say this is a decent result here, and something that can easily be fixed by the progression of grits.

    Let’s take a look at the NitroV edge:

    SEM micrographs of the NitroV edge finished with the Jende Resin 120 µm. Instrument: Zeiss GeminiSEM 560

    The softer steel with a lower carbide content shows a higher amount of deep scratches. Moreover, the apex is not very well defined, with a ragged line over the whole blade. Some cracking near the apex can be spotted on the more detailed pictures.

    Microscopic image showing a detailed cross-section of a material with visible surface textures and scratches.

    Optical micrograph of the NitroV bevel. Instrument: Marvscope

    The optical micrograph confirms this. Larger breakouts, up to several 10 µm are visible. The bevel overall has a less consistent appearance. Some burrs can be detected out of the focus plane.

    3D surface topography image showing textured patterns with varying elevations, colour-coded from red to blue, indicating height in micrometres.

    3D surface height map of the NitroV Bevel. Instrument: Zygo NewView 9000, Objective Lens: 20X. Metrological filter chain: LS-Plane to orient data, cutoff 0.1/99.9 percent to remove outliers.

    The 3D surface data further confirms this: we can see some deep scratches, reaching into the 10 µm range. Also, more scratches at 90° to the predominant scratch direction are visible. This is very interesting, as I vary my sharpening approach by this angle: I typically start at an angle 45° to the apex, until all the grinding marks from the previous stone are gone. Then I switch direction by about 90° – so that the grinding marks once again are 45° to the bevel, continue until all grinding marks are gone and then go to my testing procedure of alternating strokes on each side. Overall, that’s typically at least 100 strokes per side – that a deep groove “survives” to be visible is quite astonishing. I would guess that this is either caused by loose, rolling grains or maybe by some agglomerated nests of diamonds.

    Overall, the Jende resin stone is a decent stone. I found the feedback pleasant, although the stone stinks really badly right out of the box. Material removal is consistent after an initial drop of, it’s quite fast and a good choice to set the initial bevel. It has strong competition in it’s price range – especially by the Ukranian sharpening stones from PDT. If you are looking for a more high quality option, there are some around on the market.

  • A brief study on sharpening stones – Part 56 – FSK Vitrified #270 (Diamond, Vitrified)

    A brief study on sharpening stones – Part 56 – FSK Vitrified #270 (Diamond, Vitrified)

    This is part of a series of blog posts – looking into the appearance and composition of commercially available sharpening stones. If you are interested in the previous episodes, check out the archive for them.

    If you have some suggestion on what I should look at next, or want to share your super secret DIY stones, I could be persuaded to open the bag of analytical devices… hit me up on Instagram under @marvgro for that.

    Disclaimer: I’m not for sale. Every review you see on this blog is bought with my own money. I have no affiliation to any manufacturer.

    Review

    Today’s sharpening stone is probably the most expensive to date. It’s the very special FSK Vitrified in their brand new #270 grit size. It’s meant to be the perfect benchstone for thinning a knife, but also setting the bevel. I only know of a single store that sells these regularly internationally – and had to import them from Japan through them. Many thanks to Miura Knives for selling these outside of Japan.

    Let’s check it out!

    Optical micrograph of the FSK vitrified stone. Instrument: MarvScope

    The stone has quite the high diamond concentration. It’s my third FSK, and I was surprised by the amount of diamonds you can make out optically in this one. This is looking promising! Let’s dig deeper in the SEM.

    SEM overview micrographs of the FSK vitrified stone. Instrument: Zeiss GeminiSEM 560.

    The first impression is confirmed in the SEM – quite the high concentration of diamonds for a vitrified stone. One must not forget: FSK is an absolute high end manufacturer of abrasives, and I’d guess that the sharpening stones are just a point of pride for them, not a relevant percentage of the business.

    SEM micrographs of the stone. Instrument: Zeiss GeminiSEM 560.

    Zoomign in further, we find a dense marix in which the abrasive grains are sitting. The whole surface shows spherical marks of differing sizes. I’d guess that here some sintering / binding agent has transitioned into the gas phase and created the voids. This is not in itself a bad thing – it relieves some pressure by creating these voids. The diamonds themselves are well defined and of the more angular type. They sit recessed and well surrounded by the matrix. This is, already just optically, a very firm stone that will last for a long time.

    Let’s look at the chemical composition! For this we are going to use an advanced SEM technique called EDS. If you want to know more about this, I’ve written extensively about SEM microanalysis here on this blog.

    EDS analysis of the stone. Instrument: Oxford Ultim Max  ∞ 40mm2 EDS sensor. Note that our EDS sensor doesn’t show elements lighter than boron.

    We can find a typical vitrified bond here, but very pure – there are no additional grains but the diamond in it. From the chemical composition, I’d guess that this bond was sintered in a professional vacuum oven, with high hardness and strength as the result.

    In order to evaluate the sharpening performance and material removal mode of this stone, a blade was sharpened with it. As this is a benchstone, I’m using a Katocut Nowi Pro to sharpen the blade and an exact angle and remove the human error. Two blades are sharpened – one is a custom heat treated M398 (65 HRC), one is a commercially available Nitro-V Blade (60 HRC), which shows the stones behaviour in two wonderful steels near the opposite ends of the spectrum of knife steels. The stone was used wet and regularly splashed with water.

    The stone itself is very nice during use – it’s very hard, so there is no danger of cutting into it. It’s very homogeneous and quite flat. The blade gliding along it gives a lot of feedback (aka vibration) and because it is so hard it’s easy to determine the angle between bevel and blade. I know that these stones are hyped a lot in freehand sharpening, and I can definitely understand that. Material removal felt very slow to me – I would have expected a #270 grit diamond stone to be nearly a file, but instead a lot of passes were needed to sharpen this. By using a lot of pressure, more than I can use during sharpening, material removal sped up. Nevertheless, I can’t quite agree with the statement that this is the perfect blade thinning stone – it felt too cumbersome and slow to me for that.

    The edge is then analysed in the electron microscope for breakouts and morphological appearance. Let’s start with the M398 blade:

    SEM micrographs of the edge (M398) finished with the FSK vitrified stone. Instrument: Zeiss GeminiSEM 560

    The stone left a surprisingly smooth surface. I would guess that this is because of the very hard matrix, and the deeply embedded diamonds. The matrix is hard enough to create a lot of pressure and burnish the surface to a light gloss. The apex is quite wide or unrefined here – it definitely is a coarse stone that is meant to remove material, not sharpen. There is very little deformation near the apex, but quite a bit of plastic smearing / burnishing can be made out along the bevel surface.

    In NitroV, the stone performed quite a bit better:

    SEM micrographs of the edge (NitroV) finished with the FSK vitrified stone. Instrument: Zeiss GeminiSEM 560

    While the edge is more ragged, we also got a thinner apex. Nevertheless, the surface of the bevel is not as good as it was on the M398. I would guess that the hardness of the bond is enough to start cutting and ploughing through the much softer NitroV steel, this creating more micro prows and burrs that increase surface roughness on the bevel.

    Overall, this was a surprising sharpening stone. The finish, packaging and presentation are wonderful. It feels like a very high quality product – which it is! If your style of sharpening involves a lot of pressure, I would imagine this is a good stone, as the bond is super firm and hard. I am not sure that such an approach to sharpening is ideal – to me, pressure control is of utmost importance, and I feel like this is a major issue with all vitrified stones – the bond is just to firm for hand guided sharpening. If you are looking for a fantastically crafted coarse benchstone with a lot of feedback, this is a decent choice. I’d love for it to have more bite / higher removal rate though!

  • A brief study on sharpening stones – Part 55 – Jende Nanocloth (Strop, Artificial)

    This is part of a series of blog posts – looking into the appearance and composition of commercially available sharpening stones. If you are interested in the previous episodes, check out the archive for them.

    If you have some suggestion on what I should look at next, or want to share your super secret DIY stones, I could be persuaded to open the bag of analytical devices… hit me up on Instagram under @marvgro for that.

    Disclaimer: I’m not for sale. Every review you see on this blog is bought with my own money. I have no affiliation to any manufacturer.

    Review

    Today’s sharpening stone review is a “mini” one – and it’s only looking (doing microscopy!) at the carrier of abrasives, namely the Jende nanocloth. It’s an artificial strop, and when I first read about them, I was wondering what these would be like. It’s a mini review, as I won’t use it to sharpen or strop an edge – maybe in a future episode of the stropping series.

    The strop comes on the Jende-typical brushed finish steel blank, where it sits on a thick polymer base. This gives the whole strop quite a bit of weight – I’m unsure whether that’s a good decision for a flexible strop! The actual nanocloth is quite thin:

    Let’s take a closer look under the microscope. The lower frequency of posting these past two months is twofold – I’m very busy with development, but also wanted to upgrade my optical microscopy. I went down the “DIY” route, and probably spend more than I should have, and also more than I probably would have paid for an upgrade over our Leica Emspira. Ah well! Feast your eyes on high resolution optical images:

    Optical micrographs of the Jende Nanocloth. Instrument: Dr. Marv-Scope

    We can make out a very regular, high porosity material. It exhibits a dense matrix around some pores – the pores themselves are very evenly spaced.

    Let’s take a look under the SEM:

    SEM micrographs of the stone. Instrument: Zeiss GeminiSEM 560.

    The view under the SEM is similar – we can make out cylindrical, very straight recesses that go quite deep! I’ll have to revisit this once I coat it with diamond emulsion. Seeing how the voids are > 30 µm in diameter, I wonder what will happen to diamonds – will they just accumulate inside these voids, or also sit on the polymer matrix?